You are using an out of date browser. It may not display this or other websites correctly.
You should upgrade or use an alternative browser.
You should upgrade or use an alternative browser.
Lyman 35887
- Thread starter TomSp8
- Start date
Well, it appears I indeed have the correct small handle I reckon.....There is some noticeable slop in the handle pivot joint. I can actually twist the handles slightly one way or the other and make the top of the mold hang up on the top pin while opening. I guess the handles are just worn out maybe? Can I peen the pivot rivot to tighten it up some? Maybe shim somewhere?
Dusty Bannister
Well-Known Member
With all things there are variables. Easiest way for me to check parallel on the mold handles is simply overlay the caliper and not try to eyeball it. Clearly you need the small handles on the single cavity mold. The other handles are large. I took my mold measurements from a Lyman 6 digit number mold which might explain the difference. This also assumes that no one has custom fit the handles to a mold block of unknown origin.
See if you can turn the rounded portion which is actually a threaded nut without any flats. Go easy to avoid over tightening things and creating another issue. Gentle staking might be helpful as well. Now that you know which handles you have, mark them so you do not have to go through this in the future.
See if you can turn the rounded portion which is actually a threaded nut without any flats. Go easy to avoid over tightening things and creating another issue. Gentle staking might be helpful as well. Now that you know which handles you have, mark them so you do not have to go through this in the future.
fiver
Well-Known Member
it'd be fine if there wasn't 150 years of mis-matched tooling to deal with.
i've had mold handles screw with me before too.
and i've got a couple of them with 2-3 holes drilled in them.... LOL
the bad part is i always forget which mold it was messin with me and which set of handles i need to put them on.
notes.
which i'm probably the worst person on the planet about using.
i've had mold handles screw with me before too.
and i've got a couple of them with 2-3 holes drilled in them.... LOL
the bad part is i always forget which mold it was messin with me and which set of handles i need to put them on.
notes.
which i'm probably the worst person on the planet about using.
Bret4207
At the casting bench in the sky. RIP Bret.
If it's hanging up at all when opening, I'd make a real close check of the alignment pins for crud or burrs. I had a mould that would sort of hang because of a tiny little burr of metal that was on the side of the bottom of the pin. You couldn't feel it when closing, but sometimes you could opening. It's possible, I suppose, that the frosty bullets look better because the blocks are hotter and the expansion allowed the sticking pin to let go better. Still seems like a long shot. Also, even with the right (???) handles the pins holes can wear. You can shim the fit so the blocks just about have to open parallel.
Bret, that's what I'm kinda leaning towards right now. When opening the mold, the bottom half opens first, although I don't really feel any binding. I think Dusty was on the right path, that when the bottom half opens first, it's creating those shallows on the bullet's top flat. Some are better than others. Some are round with just the shallow flats, while others actually seem out of round in that area. I think its just inconsistent on the slop when opening. They are pretty much right across each other opposite the sprue line. I don't have another small handle at this time (I'm still very new to this) to try. But there is considerably more "wiggle" with this mold on this handle than I see on the two cavity molds on their respective handle. That makes sense that the holes in the handle are likely worn, as it is likely a very old set of handles. I measured all the various attachment screw/pins and all are identical within .001. There is also play at the handle pivot joint that could be contributing to inconsistency. I have some sheet brass shim stock in .005 & .008 that I started to experiment with last night, til the wife found more important things for me to do....., I think it will work to limit the excessive droop upon opening while still allowing enough wiggle to freely align and not bind. If nothing else, it will tell me if I'm going in the right direction, even if it's a temporary fix. Hope to try it out in the next day or so. Funds are rather tight right now.
Thank you, everyone, for taking the time to help a new guy out. I'm sure some of my questions and concerns are likely eye rollers to you guys and I will likely miss the obvious things while learning my way, along with figuring out what not to worry about, but I guess everyone learns by making a few mistakes along the way. This seems to be a great site with great people with great vibes!
Thank you, everyone, for taking the time to help a new guy out. I'm sure some of my questions and concerns are likely eye rollers to you guys and I will likely miss the obvious things while learning my way, along with figuring out what not to worry about, but I guess everyone learns by making a few mistakes along the way. This seems to be a great site with great people with great vibes!
KeithB
Resident Half Fast Machinist
@462 has it right - Lee handles will or can easily be adapted to fit most Lyman molds. I have all sorts of handles for all sorts of molds, but I keep some Lee handles around for the molds I get w/o handles. I have made my own handles but based on price and convenience Lee handles are usually cheaper to use, even if I have to drill a different hole or something. I epoxy the wood to the metal to keep them from coming off. (Lots of threads about doing that sort of thing here.) At one time Midway had them for $13, don't know about price now.
The trick is to get the handles to fit snugly enough to line the blocks up as you close them but loosely enough that the alignment features in the mold itself then take over as it is fully closed. A lot of us learned to hold the bottom of the early pinned-on handle 1 and 2C Lee molds down on a flat surface as we closed the mold to prevent the mold halves from being damaged by the skinny little alignment pins. The handles were sooo loose on many of those molds.
Judicious shimming is a good start. the marks on the end face of the bullet are, as many have pointed out, caused by the mold binding a little at the top or bottom and not opening evenly and the front of the bullet is deformed by the mold surface.
I hadn't even thought to lay the mold on a hard flat surface while opening it.......I will try that! I think this particular profile with the slightly reduced front band diameter is very susceptible to being deformed unless the mold opens perfectly or slightly top first. But then, I'm just now kinda learning my way around.....And who knows, maybe they'll shoot okay, but I mostly shoot at 25 yards indoor bullseye and if I'm gonna make my own bullets I want them to look right and be proud of them! (Of course, my bullseye skill set and abilities prob would not know the difference!)
I shoot more .45acp (200gr swc) than anything else, and once I get close to using up my supply of commercial cast from DG Bullets
I intend to get a Lee 6 cavity of that profile, so that will give me a chance to try those handles out on these molds. I also watch a lot of auction sites and am keeping my eye out for a steal on another set of small (for my small block Ideal/Lyman molds) and large Lyman handles for my 2 cavity versions. As soon as (hopefully) I get these 140 grain wadcutters to drop satisfactorily, I want to load test them to compare to my commercial cast DE wadcutters that I bought from The Cast Bullet Shop.
This whole casting thing started out for me as needing an oversized cast bullet for a .32 s&w long revolver with .316 cylinder throats that I was unable to buy commercially, in order to eliminate forcing cone leading.....lol....which I'm proud to say after some modifications to both my case sizing die and bullet sizing die, and using an oversized NOE expander plug with particular head stamp cases, was a success.
Bret4207
At the casting bench in the sky. RIP Bret.
I forget the size, but there is soft copper tubing that will just fit over the Lyman screw after you ream the burrs from the end. Might be worth grabbing one handle screw/pin and take it with you next time you go by a hardware store. A foot of that copper and pipe cutter, maybe a file too, and you should be able to shim the handles so they open and close pretty square.
I played around with some shim stock between the blocks and handle last night but was not satisfied. I hadn't considered that the holes in the handles could be worn (thanks Brett). Sure enough, they do look rather wallowed out, one side worse than the other. So tonight I cut a thin strip of .003 or .005 (forgot) brass and formed it around the pin and trimmed it. (only about half the circumference of the pin for first try) I was able to install the pins with only very slight effort and that made a big difference in the slop, and appears to still have plenty of free play for the alignment pins. Of course the proof will be when it gets hot and in actual use...prob be a few days til I have time to test it out. Trial and error, trying to make do with what I have for now. Didnt think about a short video showing the amount of slop before and after...but I will if I have to try again with more shim going around more of the pin. Hopefully how I described what I did makes sense....
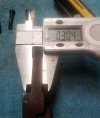
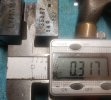
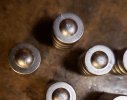
Well, I went back and played more with shimming the holes in the handles. I used .005 brass. The blocks still had some wiggle to them and lined up and closed without appearing to drag on the alignment pins. Cast some more tonight (its above 90 here still and I work in an non air conditioned shop all day, so I didn't stay out there too long). It appears to have fixed that "problem". However I was still getting a very crazy looking front band and top flat. I probably cast about 75 to 100 at anywhere between 690 and 725 degrees and tried to speed up as well as slow down, and different pouring methods, to no avail. Finally I cranked it up to about 780 and got the mold hotter. The bullets came out frosty, but much better. But it was very slow going with one cavity. I think at this point, I'm gonna shelve this one for now and come back to it later. Being new, I dont want to frustrate myself. Next up will be an RCBS 2 cavity 38-150 KT. I can't really afford any expensive custom molds at this time, so I will likely purchase a Lee mold for a wadcutter style, and will start a new thread for recommendations at that time. Thank you again, everyone, for taking time to help me out and giving me pointers as I go along. A few pics: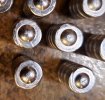


fiver
Well-Known Member
looks like the shim come out nice.
this reminds me of a 41 cal mold i picked up cheap.
the front drive band will chip and chunk on the one side if you try to operate it normal like the other molds i have that are similar to it.
i have to contradict myself and wait and wait to open the mold.
i can cut the sprue at my normal time, which i do, and then close the plate again.
and then i wait another 5-7 count before opening the mold while it's turned sideways.
i went from 90 out of 100 chipped [broken off] drive bands to about 3.
it's almost painfully slow, but i can knock out 4-500 of them in a couple of hours of focus.
it's not the worst mold i have as far as focus goes, but you do have to pay attention to it.
i don't even wanna get started about one mold i have that demands i fill the front cavity quickly and directly, and the back hole slowly with a swirl.
try that one with a dual spout bottom pour casting machine.
yeah a venting problem [rolling my eyes] i've put enough hours into that stupid mold getting it to that point that i could have just went and got a job and bought 2 of them.
won't say whose Brass mold it is but it's got another 150 bucks worth of conversion done to it, and a complete rebuild kit got run through it complete with venting sanding etc.
anyway,,, it was easier to modify a new spout for the machine than F err screw around with that mold anymore.
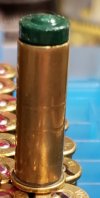
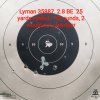
Well, I was pleasantly surprised with the results from these. I only have about 40 or 50 that I considered "good enough/keepers" and I loaded up 10 with 2.8 Bullseye, seated to the crimp groove. I had dropped one or two into the cylinders after loading to verify that they would chamber and they did. But last night at the range I discovered two of those would not. Now I can see that that the slightly undersized "ring" at the front of the forward band would indeed likely just barely enter the cylinder throat, as was discussed previously. Since I powder coat, that undersized ring is gone and the bullets must be just touching the entrance to the throats, with maybe these two not quite seated as deep. I sized these at .357 after coating, for the reasons mentioned in my other thread concerning my adventures in casting with the RCBS 38-150KT, along with the fact that they were a thou or two out of round from the mold. So I guess this tells me that maybe I don't need to be quite as critical as I thought I needed to be with the finished product, especially at 25 yards with a pistol, and my shooting ability, as none of these would be considered perfect castings by any means. Was gonna shelve this mold for a while, but maybe I will try again, applying what I've learned so far on this journey.