Making a Fixed Rear Sight for a Revolver

Petrol & Powder

Well-Known Member
Bluing that sight would probably result in a more durable finish that painting it. Although painting may give a better flat, non-reflective finish. (not to mention inexpensive).
I've used Brownell's "Gun Kote" (that's how it is spelled) to finish guns and some tools. That is a bake on finish that is very tough. I have not used the matte black finish but that finish is available. However, Gun Kote is not cheap. Buying a can just to do one sight would probably not be cost effective, however it would be durable in my experience.
 

KeithB

Resident Half Fast Machinist
I admire people who have the patience and skill to do really beautiful work. In manufacturing the perfect is the enemy of the good enough. It's just the economics.

Got a friend that does commercial metal finishing, he has an industrial grade black finish for both steel and aluminum that resists wear very well. Always thought that finish - a non-reflective black - would be great for the sights on a gun. Be glad to send you his business contact info if you're interested.

Keep up good work.
 

Jeff H

NW Ohio
Bluing that sight would probably result in a more durable finish that painting it. Although painting may give a better flat, non-reflective finish. (not to mention inexpensive).
I've used Brownell's "Gun Kote" (that's how it is spelled) to finish guns and some tools. That is a bake on finish that is very tough. I have not used the matte black finish but that finish is available. However, Gun Kote is not cheap. Buying a can just to do one sight would probably not be cost effective, however it would be durable in my experience.
I'll likely try one or both, bluing or GunKote, eventually. For now, the paint is just to be able to get a good sight picture while adjusting the windage, which I haven't finished doing yet.

If I go the GunKote route, I'd make a list of things to use it on first. I certainly appreciate all the suggestions and experience behind them.

I've actually gotten tired of always working on, fixing and correcting things on guns - NEW guns espcially, but it seems to have always been a given, no mater the brand - for me. I got a lot of mileage out of that past-time over the years, but now I do it out of necessity and hope I'm almost done. I just want to SHOOT them now. Maybe a front sight yet on this one, IF it proves to be one of those Charters I can't seem to miss with - even at a hundred yards. Lots of fun connecting with a paint can at a hundred yards with a 3" Bulldog.
 

Jeff H

NW Ohio
I admire people who have the patience and skill to do really beautiful work. In manufacturing the perfect is the enemy of the good enough. It's just the economics.

Got a friend that does commercial metal finishing, he has an industrial grade black finish for both steel and aluminum that resists wear very well. Always thought that finish - a non-reflective black - would be great for the sights on a gun. Be glad to send you his business contact info if you're interested.

Keep up good work.
Keith, it means a lot hearing that form someone who knows his way around a shop. I'm not a machinist, not much of an artist and (according to many) not very patient. I AM stubborn and persistent - when I'm on a mission. The time that's gone into this would definitely yield a horrendous bill if I were trying to do this for a living, so it's quite a luxury - at the expense of time - a little bit of time at a time. It is definitely not the most efficient way to do it.

Experiencing what others did before the advent of the Industrial Revolution, and being ABLE to have something without using cash are two expensive luxuries in this endeavor as well. I've worked in industrial automation for over thirty years and am still astounded at what machines with computers for brains can turn out very quickly and very cheaply, but it's going to be what it's going to be and you either settle for it or pay a serious premium to have it your way.
 

Jeff H

NW Ohio
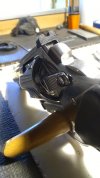
OK, the pics do not do the definition of the rear sight notch justice. This was very difficult to photograph using a $80 "smart phone." I may or may not wipe this texture and start over, but it really looks nicer than the photos will admit and it actually works well.

I need to contact Charter and get a couple matching screws. These are the original front and rear sight screws for the adjustable sight I am replacing. I underestimated just how difficult it would be to find a small handful of 3-56, flat-head screws online. I thought it would be cool to have hex socket or Torx-drive recesses, but slots will be just fine.

The 3-56 screws from ACE's gunscrew drawers have a small fillister head, which is inappropriate for this, but I was able to use one to make a sort of "transfer punch," which I put a point on and screwed down into the threaded holes, leaving just a tiny bit of the point sticking out/up. I placed the fitted sight in the recess and gave it a quick rap with a brass hammer to locate the first sight base hole from the bottom.

Once I drilled and coutersunk the first hole, I repeated the process for the second hole, but with the sight screwed down with one screw to mitigate as much play as possible. My drill press wants to move as a chucked drill contacts the work-piece, so I always have to figure that in, so any other means to reduce error MUST be exploited.
 

Attachments

  • Charter Fixed Sight 09 (Copy).jpg
    Charter Fixed Sight 09 (Copy).jpg
    39.3 KB · Views: 12
  • Charter Fixed Sight 10 (Copy).jpg
    Charter Fixed Sight 10 (Copy).jpg
    71.9 KB · Views: 12

Ian

Notorious member
Use a center drill in your drill press to reduce walking when spotting a hole. That project would have been a pain in the butt with a good mill and vise, you're one determined individual to have done it all with a file.
 

Jeff H

NW Ohio
Use a center drill in your drill press to reduce walking when spotting a hole. That project would have been a pain in the butt with a good mill and vise, you're one determined individual to have done it all with a file.
LOL! Ian that's WITH a center-drill!

It's not so much that the drill walks as the quill moves. Not the greatest drill press, but I inherited it from an old friend of my dad some years ago.

I didn't share as many pics as I took, but I see what you mean and I had to work around how to hold it until the bulk of the gross metal removal was done and a fair bit of the finer shaping. I left the whole sight attached to the original bar stock as long as possible to shape the whole tang, then cut it off and started getting creative holding it. It was in and out of trhee different vises numerous times, so it would have been chore a to try to figure out how to keep it in one vise the whole time so you always had your datum.
 

KeithB

Resident Half Fast Machinist
It would have taken several setups even with a mill to do all the features. Leaving a handle on a part and then cutting it off as one of the last steps is a good technique. We do something similar on a couple things we make. The only down side is the waste of some material but that's usually small cost compared to the cost of labor, extra setups, etc to be too frugal. Right now I'm sitting here tending our CNC mill making an item where the end product weighs 1/6 of the starting billet. 5/6 is turned into chips and waste. It's all handle!

A friend of mine has two MFA degrees, one in blacksmithing. We've sat and discussed various topics. Prior to the use of powered metal removal tools (mills, lathes, shapers, etc) it was often easier to move metal from place to place instead of removing metal. The last steps may require some material removal but the first steps displace metal.
 

Bret4207

At the casting bench in the sky. RIP Bret.
LOL! Ian that's WITH a center-drill!

It's not so much that the drill walks as the quill moves. Not the greatest drill press, but I inherited it from an old friend of my dad some years ago.

I didn't share as many pics as I took, but I see what you mean and I had to work around how to hold it until the bulk of the gross metal removal was done and a fair bit of the finer shaping. I left the whole sight attached to the original bar stock as long as possible to shape the whole tang, then cut it off and started getting creative holding it. It was in and out of trhee different vises numerous times, so it would have been chore a to try to figure out how to keep it in one vise the whole time so you always had your datum.
I just watched a video last night of a guy with a fancy new magnetic drill getting ready to put some set screws at the junction of two pieces of shrink fit metal. Even with the center drill you could see the flex in the quill and chuck. When he went to "countersink" the holes with what he had on hand, a 5/8" twist drill, the whole thing walked right off center from the mild steel insert into the cast iron of the original piece. I didn't see a brand name, but I know this guy is a big mouth piece for "Jeffies Dollarama" (as Ian call Amazon), so I imagine it came from there. It was pathetic, that much is for sure.

I like your reference to shooting paint cans at 100 with a 3" Charter. I remember the write Ross Seyfried (sp?) writing about learning long range handgunning with a 2" 38 snubbie. If you can hit with a 2 or 3" barrel, you certainly have the basics down!

Wonder whatever happened to old Ross? He came in like gangbusters with an endorsement from Elmer and then after a few years he vanished.
 

Jeff H

NW Ohio
You should be very proud of that work.

Well Done !
I didn't think that much of it at first, but you guys are making me feel proud of it. Like I said, I'm not "god at" anything, I just put my mind to it and stay at it until it's right. Requires a lot of focus and concentration, which these days is harder to come by. The "exercise" makes it worth the effort in that respect.

Thank you, Sir.
 

Jeff H

NW Ohio
It would have taken several setups even with a mill to do all the features. Leaving a handle on a part and then cutting it off as one of the last steps is a good technique. We do something similar on a couple things we make. The only down side is the waste of some material but that's usually small cost compared to the cost of labor, extra setups, etc to be too frugal. Right now I'm sitting here tending our CNC mill making an item where the end product weighs 1/6 of the starting billet. 5/6 is turned into chips and waste. It's all handle!

A friend of mine has two MFA degrees, one in blacksmithing. We've sat and discussed various topics. Prior to the use of powered metal removal tools (mills, lathes, shapers, etc) it was often easier to move metal from place to place instead of removing metal. The last steps may require some material removal but the first steps displace metal.
Keith, THAT is absolutely fascinating! I did ten years at a company which designed and built coolant filtration sytems for machining and grinding operations, from one-off units serving a single machine in a machine shop, to entire engine plants. I had to do a lot of figuring related to the design of those systems and you just reminded me of that. You made me curious, so I measured and weighed and come up with figures relating to your references to waste v. part.

Since I lost a very small piece I hack-sawed off (half of which was saw chips), I'm counting that piece as chips but it wasn't much.

I sawed off a sizable chunk right off that bat, but saved that because it will be just right for something, someday - it weighs 1.2 ounces.

The "handle," in my case is just the rest of the 1/2" x 1/2" bar stock, but two inches shorter, so I kept that too. Not really "waste" in this context.

The original piece started as two inches of bar stock and would have weighed 2.26 ounces.

I initially removed the large piece, which weighs 1.2 ounces.

The final part weighs .217 ounces, which is about a tenth of the original weight, which minus the chunk, leaves .843 ounces in chips, or a bit over a THIRD of the original part converted to chips. Sure doesn't sound like much after all the filing! I felt like I should have been ankle-deep in filings!

Blacksmithing and machining have always fascinated me, but I was discouraged from both by my original mentor, who was an amazing tool & die maker. Missed that start as a kid and ended up doing a lot of other things. My next "career" will be RETIREMENT (I hope) and I'll just dablle more in making what I want and seeing how much I can do with how little.

Thanks for sharing that. I really enjoyed it.
 
Last edited:

Jeff H

NW Ohio
I just watched a video last night of a guy with a fancy new magnetic drill getting ready to put some set screws at the junction of two pieces of shrink fit metal. Even with the center drill you could see the flex in the quill and chuck. When he went to "countersink" the holes with what he had on hand, a 5/8" twist drill, the whole thing walked right off center from the mild steel insert into the cast iron of the original piece. I didn't see a brand name, but I know this guy is a big mouth piece for "Jeffies Dollarama" (as Ian call Amazon), so I imagine it came from there. It was pathetic, that much is for sure.

I like your reference to shooting paint cans at 100 with a 3" Charter. I remember the write Ross Seyfried (sp?) writing about learning long range handgunning with a 2" 38 snubbie. If you can hit with a 2 or 3" barrel, you certainly have the basics down!

Wonder whatever happened to old Ross? He came in like gangbusters with an endorsement from Elmer and then after a few years he vanished.

Ross Seyfried,... Man, I don't know. He did just sort of appear and he was good from the start - didn't seem to need to build credibility over years. I enjoyed his work a lot, but haven't read anything new in a long time. I don't take any subscriptions and don't "get out" much. Don't associate with the outside world any more than going to "work" (school) and even then, I've pretty isolated, so I haven't seen anything new from him, either because I've missed it or he isn't writing.

I'm out of practice, but I think it'd come back quickly enough with some focus. Walking in a series of ranging shots on a target of that size is one of the most fun things I've ever done. After a while, you get the feel of the gun and the load (and stick with that load), and you almost don't have to - no, you probably shouldn't try to hard to use the sights. I've always said I might not be able to take out a sniper at that range with a handgun, but I oughta be able to worry him enough to make him keep his head down some! Maybe.;)

The 3" Bulldog was especially great for that. We had a steel plate posted at a hundred yards once, about the size of a medium-build torso and I could hit that with the Bulldog five out of five times. I wouldn't push it after that, because then I'd miss, and once you start missing, you just keep getting better at missing and that's much less impressive. The two-foot height offered a lot of leeway, so it wasn't that much of a feat, but it was amazing fun.
 

Bret4207

At the casting bench in the sky. RIP Bret.
Down at the Harold F Martin Jr. Memorial Ballistics Research Center, aka- the sandpit on my farm, I have a skid shoe off a NYS DOT plow hanging by 2 chains off a steel tripod. If you don't know what a skid plate or giant snow plow is, count your blessings! Anyway, this thing is about a 12" circle of steel maybe an inch or so thick mostly, and some of it is more like 2" where it didn't wear as bad. The boys loved shooting that thing because of the nice "pling!" sound it made. At 100 yards with open sights or off hand it can be a challenge for those who aren't really as good a shot as they think they are. It get's worse if you tell the sharp eyed, steady nerved young folks that it's actually larger than a deers vital areas, and a couple times larger than a coyotes. I think "humbling" would be the word to describe it. But it's a darn good object lesson too!
 
Last edited:

JustJim

Well-Known Member
Seyfreid writes for The Double Gun Journal--I think he's the reason they added "Single Shot" to the current title, which I always forget.

I enjoy it when folks give me lectures about how you can't hit anything with a snubby at 100 yards. I've been shooting them at that range for 25+ years, when I was seriuos about it I was wearing out a Chief's Special every year. My current SP101 may be the ultimate 100 yard snubby, though I've always wanted to ttry a 44 Special Bulldog Pug.
 

Jeff H

NW Ohio
Seyfreid writes for The Double Gun Journal--I think he's the reason they added "Single Shot" to the current title, which I always forget.

I enjoy it when folks give me lectures about how you can't hit anything with a snubby at 100 yards. I've been shooting them at that range for 25+ years, when I was seriuos about it I was wearing out a Chief's Special every year. My current SP101 may be the ultimate 100 yard snubby, though I've always wanted to ttry a 44 Special Bulldog Pug.
Keep an eye out for the older Bridgeport production with the tapered barrel.
 

KeithB

Resident Half Fast Machinist
Not to butt in on your thread but thought you might like to see the item I was referring to. It's called a Supertrack and its basically a canopy track extension for a certain model kit-built aircraft. We start with a piece of 3/4" thick x 3" wide x 14-7/8" long 6061 bar stock. It gets flycut flat on one side on the manual knee mill and then we bolt that surface down to a fixture in the CNC mill where we can do all the rest of the work. We make right hand and a left hand (mirror image) pieces using the same fixture. The one shown below is a left hand part.

supertrack.JPG

We get one piece of scrap big enough to have a potential use - it measures a little over 1-1/8" wide, .72" or so thick, and 8" long. I wish I could find a product to make from these but so far all I've done with them is store them or mill them down to make T-slot filler strips for our mill and drill tables. Oh, and I've given a bunch away for the price of shipping. Jeff, if you or anyone else would like a flat rate box of these talk to me we can work something out.

supertrack2.JPG
 
Last edited:

Ian

Notorious member
Me too. With a little machining they make great vee-blocks, vise soft jaws, and parallels.
 

Jeff H

NW Ohio
@KeithB , "butt in??"

You kiddin' me?

I'm honored that you are willing to take the time to share such experience and wisdom. Seriously!

That is one crazy "part." Any time I see something made using today's technology and modern manufacturing methods, I wonder how they might have made it a hundred years ago. Imagine the hours that would have gone into that. THAT would have made that part a ridiculous idea then and something would have been designed to suit contemporary means.

Changes in technology drove changes in products. Look at the Savage 110 or the Charter line of revolvers, ANY of Ruger's guns. The Remington 700 is hailed as a wonder of rifles, and it well may be, but in reality, it's a CHEAPER to build rifle than its predecessor, which was cheaper to build that ITS predecessor, and so-on. The pre-64 Model 70 gave way to the cheaper-to-make push-feed that followed and the CZ 550s and 527s fell to cheaper-to-make rifles. Making the old Mauser action must not be terribly conducive to reproduction using extant technology, or we'd be enjoying those guns yet.

Savage and Charter were seen as "cheap" guns for decades, but the old Savage 110s I've shot were very accurate. The (old) Charters I've had were excellent guns - they just weren't made using 18th century design, which isn't as easy to execute using today's technology.

We trade in hours for scrap and chips today.