Base flashing

Brad

Benevolent Overlord and site owner
Staff member
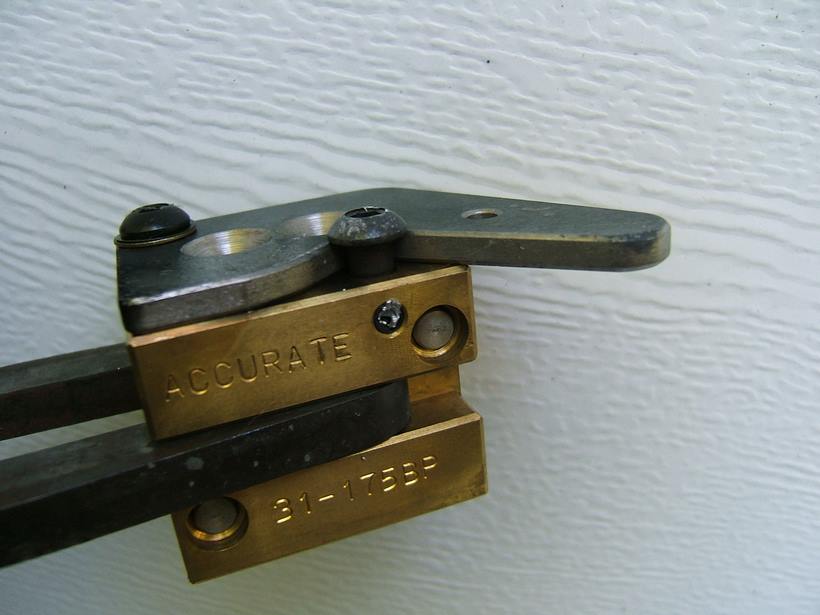
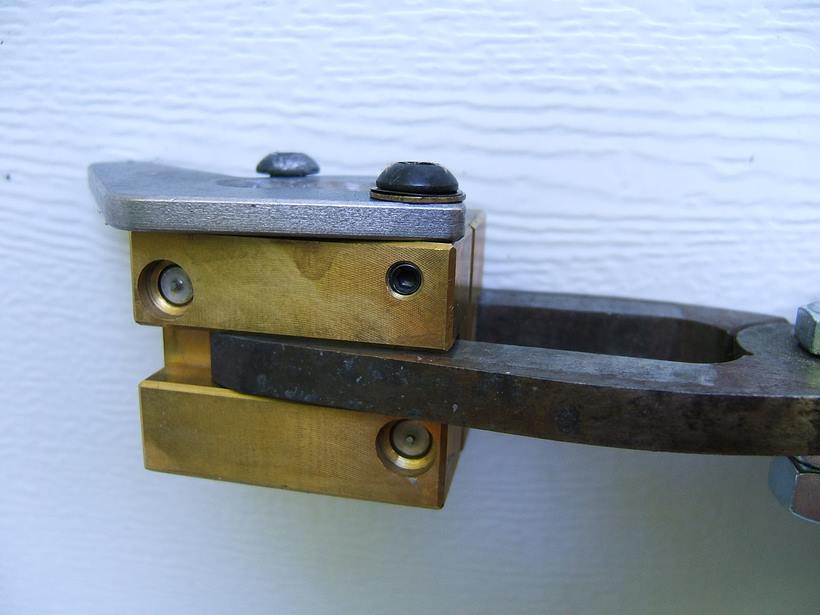
I have been fighting base flashing on bullets from the 2 cavities farthest from the pivot pont on my 4 cav brass MP 452200 swc mould.
The mould didn't do this when new, it seems to have started recently.

image.jpeg
Even the top bullet has a hint of flashing but far less than the other two.
image.jpeg
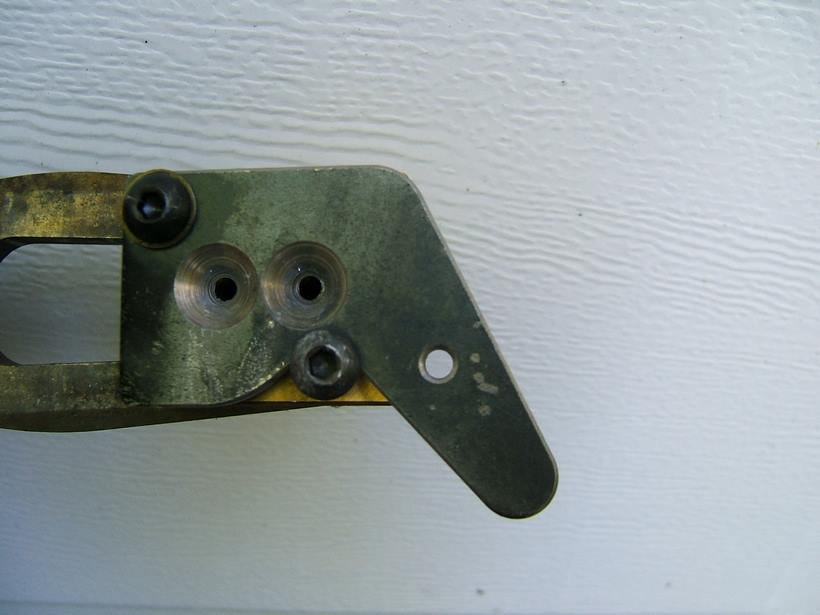
No major signs of galling or wear around pivot point on top of mould. I keep it well lubed with Ester 100 AC oil
image.jpeg
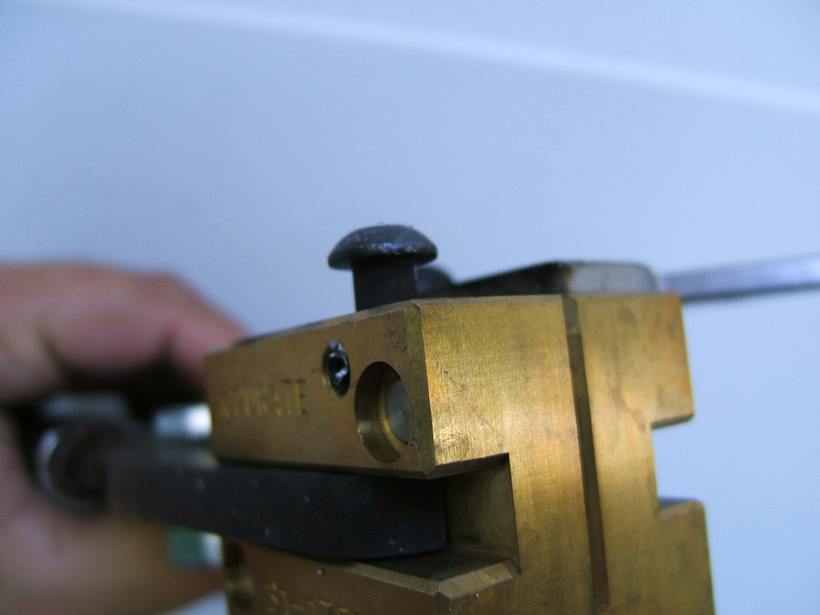
You can see light between sprue plate and mould surface. I have the plate pretty loose, I can easily swing it with my little finger. MP places a small bushing in the plate pivot hole so over tightening can only go so far as the bolt begins to compress the bushing without putting much more tension into the plate.

Any ideas on what to do to make this stop? It does seem to improve at some mould temps, I just haven't been able to find a tempo that can stop it.
 

Ben

Moderator
Staff member
Brad,

My idea after seeing the daylight under the sprue plate is that the sprue plate should be tightened up more on both ends.

In my opinion, there is way too much daylight visible under the sprue plate in your photo.

Clean the top mold surface and the underside of the sprue plate good with a good solvent.

Re-lube with a good quality 2 cycle oil ( a VERY small amount on the sprue plate and top surface of the mold ).

Get it hot and cast.

Let us know.

Ben
 

Ben

Moderator
Staff member
MP places a small bushing in the plate pivot hole so over tightening can only go so far as the bolt begins to compress the bushing without putting much more tension into the plate.

May have to thin that bushing to be able to get the sprue plate closer to the tops of the mould block and minimize the daylight seen currently under the sprue plate.

Ben
 

Brad

Benevolent Overlord and site owner
Staff member
I have thought of making and installing a headed bot to use in place of the roll pin as a plate stop. Something I could use to adjust the tension on the tail end of the plate.
I may just spend some time on the lathe tomorrow and see what I can make.
What I want is something similar to what NOE uses on their moulds.
 

Ben

Moderator
Staff member
Totally remove the sprue plate.

Lay a straight edge across the tops of your blocks and see if the corner that holds the sprue hold down bolt is still in the " same plane " with the rest of the blocks.

Now check the underside of your sprue plate. Is it perfectly flat also ?
 

Ben

Moderator
Staff member
I have thought of making and installing a headed bot to use in place of the roll pin as a plate stop

Yes, I'd definitely do that.
Also put a locking screw on the side, I use a 10-24 to hold it once you get the ideal tension.
 

Ben

Moderator
Staff member
What I want is something similar to what NOE uses on their moulds.

Yes, I like Al's set up. I have zero problems with the sprue plate design on his 5 cavity moulds. Very easy to control sprue plate tension on both ends.
 

Brad

Benevolent Overlord and site owner
Staff member
It has a set screw but it is tiny. It is like a #4 screw but metric. I would be happy with a #8 but this thing is way smaller. That might get a change too.

I will measure the bushing and compare it to the plate thickness and see what I get.
 

Ian

Notorious member
NOE and accurate don't have that problem. The roll pin stop on MP moulds is pretty much my only design criticism. I pulled mine out, drilled and tapped the hole, and installed a dome head socket screw just like Ben recommended.
 
F

freebullet

Guest
Looks to me like the galling around the sprue plate screw hole on the block top is messing you up.

If you put a small piece of lead shot or copper wire in the hole before the set screw it will hold your adjustment better even with the tiny screw.

If you pull everything from the top you could surface dress the top. I use 320-400 grit stuck to a flat surface & draw the blocks clamped together over it in a cross hatch pattern. I do that to heavily used Lee molds on the regular & it helps keep a clean flat surface. I don't use the mp molds that hard & haven't needed to go there on them.
 

Brad

Benevolent Overlord and site owner
Staff member
I did give the area around the pivot a light stoning. Just enough to remove any burrs or raised edges. Took about 30 seconds with a fine India stone.

The hardware store will be visited tomorrow to see if they have a domed head screw.
 
F

freebullet

Guest
Stoning just that corner might make it worse. When I get to that point with the lee molds I do the whole surface & the bottom of the sprue plate. Your trying to get them both clean & flat again. My main lee 9mm mold has 50k plus through it now and I've done that about every 2500-5k bullets. I use it hot & fast without regard for mold longevity.
 
F

freebullet

Guest
Your sprue plate has clingers down on the cutter too. Use a fat Phillips head screwdriver & it pops off in a turn or 2. Those little clingers on the cutter will not help and can cause minor flashing when the build up gets bad.
 

Ben

Moderator
Staff member
Brad,

Between you, the hardware store, and that nice lathe of yours, I'm betting your flashing problem will soon be history.

Share some " after " photos with us please.

Ben
 

Brad

Benevolent Overlord and site owner
Staff member
I have a few ideas Ben. :)

The amount of stoning I did near the pivot point was very minimal. I knocked off a small raised portion right at the edge of the screw hole and little more. It was probably 4-6 light strokes with a medium India stone.
 

Ben

Moderator
Staff member
Brad,

Nice crisp, sharp bullet bases with Tom's design.
Zero flashing.

9WXqldf.jpg


uQCi3Fu.jpg


pRXajXG.jpg


RyXTcm8.jpg


GKknkIi.jpg
 

Brad

Benevolent Overlord and site owner
Staff member
That is exactly what I plan to make. I need to find the right screw at the hardware store then make a little bushing to set the height. Drill and tap for the screw and a set screw.
It will take a couple hours but will be well worth the effort.
 

Brad

Benevolent Overlord and site owner
Staff member
I must have done it right, it took 2 trips to the hardware store! My dad always said that every project required at least one return trip, he was right.
First time I bought some 8-32 set screws and 10-32 button head cap screws. Got home I discovered that a 10 screw falls right them a hole for a 5 mm roll pin. I went back and picked up a 12-20 tap, that would be big enough. No button head cap screws between 10 and 1/4 inch to be found. Being a resourceful guy I thought about Miha and the mould being an EU product. Yep, a 6-1 metric tap was found and proper screws too.

I spent more time makng the 2 trips than I did doing the work.

You can see the light stoning I did to remove the burr left by the tap.

I had to file a slight bevel on the leading edge where the sprue plate goes under the cap screw. This is because I snugged it down enough to eliminate the light gap between plate and the top of the mould. Lots of lube will be used there.


image.jpeg

image.jpeg