My PID

3

358156hp

Guest
This whole project started over a month ago when the thermostat in my Lyman Mag-20 went out. I have always been content with it's performance, and would have been happy simply replacing the thermostat, and continuing on my Luddite way. 'Twas not meant to be though, when I called Lyman for a thermostat, they of course refused to sell me one. Factory installation only you know. Send it in, and we'll replace it for you, $50.00 for parts, plus labor. Plus shipping. Both ways. Service is running about 30 days right now. No thanks.

Enter, the 21st Century! PIDs are the way we control temperatures now. The parts are as little as $45.00, and you'll get superior heat control. I was skeptical, but I went ahead and ordered parts from Amazon. Somehow I missed the part where practically everything ships from China, please allow2-4 weeks for delivery. Oh, add a week because it's Chinese New Year, and everybody takes a week off. Tradition you know. I guess if they don't have an Independence Day, they need to have somethingo_O.

And then the parts arrive, and I can get started. I was lead to believe it was really simple to build a PID, and it is. I made it harder than necessary by caving in to my OCD (actually CDO if you keep everything in its proper order:)) and color coding almost every wire in the doggone thing. Tom (oldatheart) laughed when he saw it. I didn't care, it was right. Now for a few details.

The outer box was from an old computer power supply. The one I used was broken, but I still kept it. Gotta be practical you know. Here's one now!
PID1.jpg

It was kind of puny field dressed...
PID2.jpg

The gutpile. I tossed it all, I was planning on using the wires for my circuits, but it was 18 gauge, and I wanted heavier wire than that OCD (err..CDO) again!
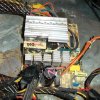
PID3.jpg

And new innards, direct from China.
PID7.jpg
Add a few feet of wire, and connectors from the Hardware store, and you're ready to start assembling!
More to follow, I'll bet I'm running out of space with all these pics. Stay tuned!
 
3

358156hp

Guest
What kept you? I've been waiting. The next part is to take my Dremel tool (the good one, not the one I use for gunsmithing), and cut a few holes in the box for the PID unit itself, the plug for the thermocouple. and the outlet plug. I reused the original power boxes power cord, socket, and power switch. I think I'll use new pieces for this on the next one because soldering wires to metal terminals in a plastic housing isn't terribly time effective. In fact, I melted the first power switch trying to solder to it. Who knew a propane torch flame about 1/4 inch from a plastic housing would melt it? Cheap Chinese junk anyway! Anyway, if you follow the wiring directions on the PID you'll stand a much better chance of getting it right the first time. Mine worked correctly the first time I plugged it in. I left the top off so I have better access to everything with the fire extinguisher. I usually pay others to do electrical work for me, but Tom was building his own too, and I couldn't let him beat me. Here is a pic from the test run. I plugged my El Cheapo LEE pot into the outlet with the dial turned all the way up, and it heated. I only ran it until the lead started to melt, because I didn't have a thermocouple installed on it yet. that will be in Part C of the series.
pid8.jpg

I've buttoned everything up since this pic was taken, and now I'm going to turn my attention to the making the Mag-20 work with the PID. I'll remove the dead thermostat, and do the rather basic modifications to make everything work together. While I'm in there, I'll do the obligatory sandblasting and painting, and cleaning. I may replace the element with a fresh one while I'm at it. Here's a pic of the old girl. Digital pics make everything look worse that they really are, it's really in decent condition for a pot of it's age. It's just dirty.

PID6.jpg

More to come!!
 

Brad

Benevolent Overlord and site owner
Staff member
Looks no worse than my 91 vintage RCBS. But paint? Cleaning? Are you daft?

The PID will make things much easier than a new thermostat.
 
3

358156hp

Guest
They're about the same age. I have two thermocouples, ones going into the bottom of the Lyman pot so I can still use it as bottom pour and ladle. The other is going into El Cheapo, my LEE 20 lb ladle pot. I may put one of the button style thermocouple in the LEE too, after a bit. If I end up heat-treating, I'll add a third one for the oven a la Brad.

I'm headed down to blow the pot apart. When I put it back together I'll replace all the hardware too. It's cheap insurance on something that heat cycles. The old hardware appears to be grade two, is blued, and has rusted. I won't use plated hardware, but may be a sport and reassemble with stainless hardware.
 

oldatheart

Active Member
I took a 3/8 bolt and drilled and tapped it for the thermo. I drilled a hole through the lee pot and just tightened the crap out of it. No washers. I did think about staking it but if it leaked I would have been pissed! I turned a brass spacer rod that fit in the hole to take out the wiggle in the thermo and give consistant readings. Works great! I'm not sure it is reading the correct temp? But it's repeatable! I have to order a new thermometer as mine broke during smelting somehow last week.
 

oldatheart

Active Member
Ps if any one needs help on the wiring it is EASY! I made it out to be way more complicated than it is! The hard part was controlling the urge to make everything perfect. Mine is all solderd and heat shrunk. The wires are all run around the case. The heat sink was lapped to the ssr "way overkill do not waste your time" the heat sink was attached with studs and torqued down with thermo paste and floated above the case bottom. All of that was for nothing this thing barely gets warm! The hard part was all in my mind.
 
3

358156hp

Guest
(Sniff) There's a lot to be said for perfection old boy.... My wiring is much purtier than yours, and all color coded to boot. You have the stock black finish, and mine is a lovely Hammertone Grey.
 
3

358156hp

Guest
By all means, go for it and build one. It goes pretty quickly once you get started. Tom and I both put off starting assembly on ours for about a week because we figured it would be an ordeal. Assembly wasn't an ordeal by any stretch of the imagination. Save yourself some aggravation and buy from somebody like Auber Instruments. You will pay more, but you'll have everything in a couple of days. Toms parts were ordered off Ebay, and mine came from Amazon. He ordered at least a week before I did, and our orders arrived withing two days of each other. Over two weeks after we ordered them. I was a bit annoyed, to say the least.

Compare that to NOE. I ordered a mould Friday morning. It arrived in todays mail. He's in Utah, I'm in Nebraska.
 

Brad

Benevolent Overlord and site owner
Staff member
A PID is a controller that lets you input a desired temp and the device, via a thermocouple, reads the temp. It the "learns" how to maintain that temp as closely as possible.

That is my short answer. I like being able to set a temp and know that is the temp I will get. Seeing the digital readout when I add an ingot is interesting too. The temp drops a bunch then climbs back up.
 

oldatheart

Active Member
proportional-integral-derivative
It will control the temp and temp swings of your pot. Using an algorithm it will take readings and learn your pot to make adjustments for you to maintain a constant repeatable temp.
 

Brad

Benevolent Overlord and site owner
Staff member
It makes a big difference for me in the heat treat oven. I can set a temp and once reached the temp doesn't vary by a degree except when I open the door. Knowing I get a repeatable, precise heat treat temps makes me confident that my bullets are the same hardness from batch to batch.
 

Rick

Moderator
Staff member
Knowing I get a repeatable, precise heat treat temps makes me confident that my bullets are the same hardness from batch to batch.

Assuming the exact same alloy is used from batch to batch. :rolleyes: Vary the antimony content and you vary the final BHN AND the time it takes to get there.
 

Brad

Benevolent Overlord and site owner
Staff member
Assuming the exact same alloy is used from batch to batch. :rolleyes: Vary the antimony content and you vary the final BHN AND the time it takes to get there.
I was speaking of a single alloy. That is why I make large batches of stuff.
 
3

358156hp

Guest
I was skeptical at first, but since Lyman annoyed me so badly, I decided to be more flexible.
Now...

Sunday silliness time
 

minmax

Active Member
DON'T TRY TO PAINT IT! I used the highest temp paint I could find, made for exhaust and headers. I let it dry for several days before I heated it up.
The paint smoked alot and was sticky to the touch. It has been a couple of months now and it sill gets that way. I thought the heat would cure the paint and make it harder, but no. I think I am going to powder coat it, when and if I get set up to PC bullets.

Other than that both you guys did a great job on your PID's.
Thats another project I have on my, someday get to it list.
My problem is I'm OCD too.