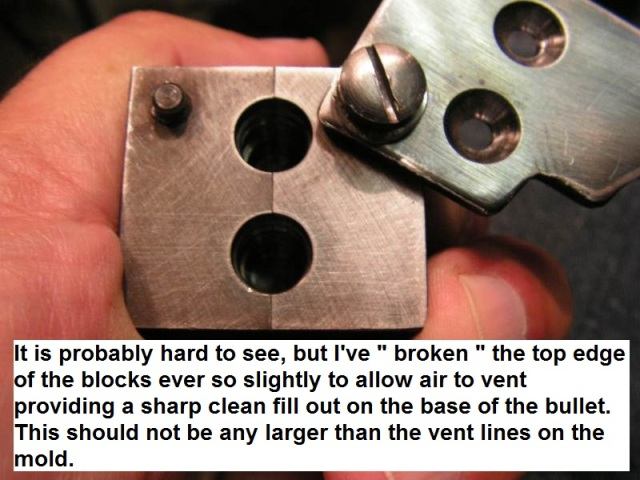
It is a common practice for me to " break the top edge of the blocks " when I get a used mold or a new mold that doesn't want to offer good bullet base fill out. I use this technique on Steel, Brass, and Aluminum moulds. 1 cavity, 2 cavity, 4 cavity, and 6 cavity.
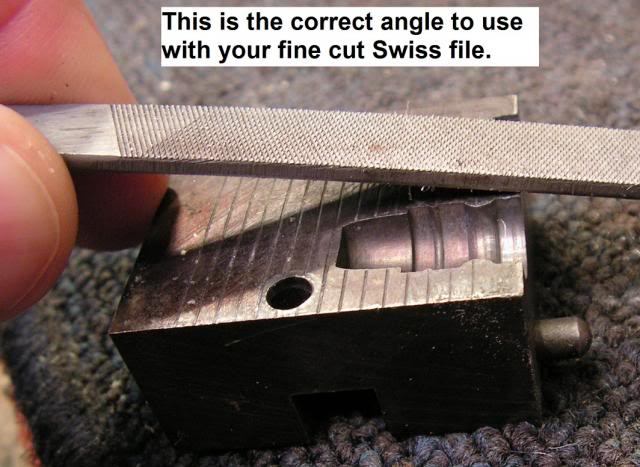
This 1st photo will show the correct angle to hold the file.
Be certain that the file doesn't enter the mould cavity. It may work out best for you to put the mould in a padded vise so that it cannot move. Then you can focus your efforts on the angle of the file and making short smooth strokes with the file.
I use a very fine cut flat Swiss file. ( The file I used in the photo above is too coarse, I have a very fine cut file, I just didn't have it handy for the photo session ) Some use a fine cut flat stone to accomplish this. It is important not to remove too much metal as you'll end up with " fins " on the base of your bullets. The amount of metal that you'll remove should offer you about the same gap as a vent line on the top surface of your mold blocks.
It is best to go a little at a time and stop and make about 40 bullets to see if the metal you've removed has made a difference in your problem.
Remember , once metal is removed - it can't be put back on ! Only remove enough metal to offer good bullet base fill out and then STOP !
Look closely at the tops of the blocks.
You can see the " shiney " areas where I've removed a tiny bit of metal on both halves of the mould .
This technique that I'm describing makes a
BIG DIFFERENCE in base fill out on any brand of mold, steel, brass, aluminum, etc !
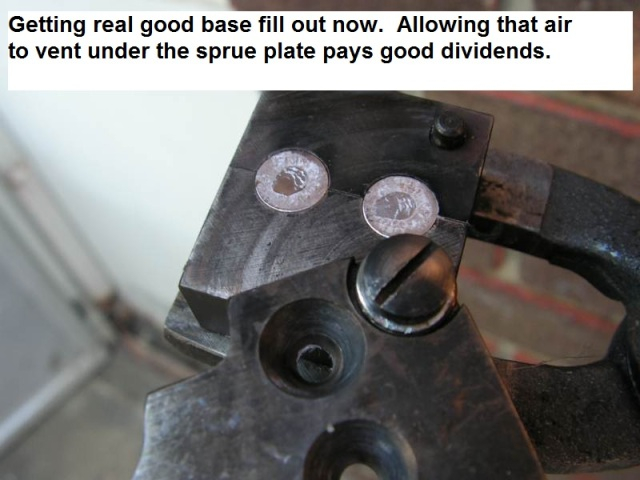
The mold that you see in the photos below didn't want to offer bullets with decent base fill out regardless of the mold temp, alloy temp, etc. After the vent lines were added at the very top edge of the blocks ( see the last photo ) , the mold base fill out was near 99%.
Be certain that the sprue plate is not too tight. It should swing from right to left with very little effort. This will aid in the venting of air as the mold cavities fill.