Isaac Haines kit build log

Ian

Notorious member
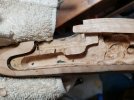
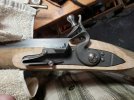
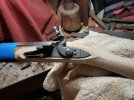
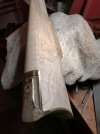
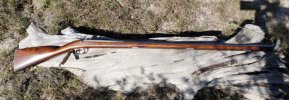
I bought this unfinished kit from a member recently and finally got a chance tonight to inventory it and check it over. It's a very nice chunk of maple with strong curl from end to end and is shaped well for having come off of a duplicating machine. The 38" swamped Colrain barrel is fully and very nicely inlet and all filed out and the large Siler lock mostly inlet, it sits a little off the barrel flat because the flintcock is hitting wood that needs to be profiled off. The trigger guard, rammer thimble, and butt plate inlets are partially roughed out.

First thing to do is check barrel to lock alignment and then get the barrel tenons installed, inlet, drilled, and pinned. A check of the flash hole location brought me to the first problem: the barrel is too far forward for a flash hole liner. I assume the kit wasn't designed for one because one wasn't included, but I insist, so will have to set the barrel back about 3/16" to make it right. This poses two problems, first the kit barrel has a very chunky, flared tang not correct for the style it purports to be and moving it back induces gaps, and second, the barrel inlet will open up slightly in the back and bind in the front as the barrel is moved. Alao, Isaac Haines always fluted his tangs at the back, but that ship has sailed so we use what we got. I think I'll just live with the gap and square tang tail, mill 3/16" off of back of the tang, and inlet the barrel back the same amount. This will push the top of the tang proud of the stock but it needs to be thinned a bunch anyway. Fortunately no holes have been drilled in anything yet.

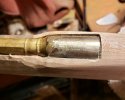
Here you can see the breech plug face location (forward edge of Sharpie line) and the FH location, the center of the FH and face of plug are 1/16" apart:
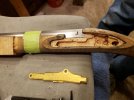
20240113_220730.jpg

The vertical alignment of pan and barrel are perfect. It also appears that the front lock bolt will line up well with the web between the rammer hole and bottom of the barrel but I need to drill a small test hole in the bottom of the barrel channel to see how thick the web really is.

I had to laugh going through the parts when I discovered that Track's order picker put a right-hand side plate in this kit even though the paperwork clearly shows a LH one, so I'll be making a new one of out of cartridge brass bar. The nose cap and trigger/ bottom plate assembly are hopeless, so I will make a proper nose cap from sheet brass and am very seriously considering installing a double-set trigger assembly for it even though not correct for the build. At the least I will make a single trigger and pin it high in the stock with a new plate. Still mulling it over as a Siler lock with proper single-trigger geometry can result in a very nice trigger pull.

Once I get the barrel in, tang bolt drilled, lock fully situated, and both the lock bolts drilled I will move onto filing the buttplate and fitting it to the stock, then making a toe plate and fitting that, trigger guard, side plate, rammer thimbles, and finally the nose cap. After that I'll finish shaping the stock, install a four-piece patch box, shape the forearm and toe mouldings, and start the relief carving. This is going to be fun!
 

Ian

Notorious member
I have to add that the custom internal crate Rob made to reinforce the original cardboard box and hold everything in place inside should be a master class example for anyone shipping gun parts. If he'd put the same amount of precision work into continuing the rifle build as he did the crate he could have just about finished it up!
 

Ian

Notorious member
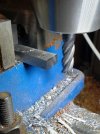
Milling 1/8" off of the tang.

20240114_104016.jpg
20240114_104352.jpg

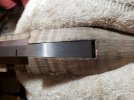
After milking back the wood and a final shave to clearance the end of the tang.
20240114_113213.jpg

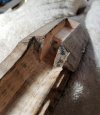
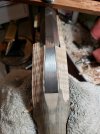
On to rough profiling the tang area and filing down the tang to the correct profile.

20240114_115842.jpg

Now to fit the lock. After cleaning up the mortice I found some interference points and shaved them down. Ended up sinking the front of the lock about 1/32" deeper to get good barrel contact.

20240114_122810.jpg

Voila!

20240114_124853.jpg

Notice the new flash hole location, now there will be just enough room for a 1/4"-28 flash hole liner to be installed without interfering with the breech face.
 

Ian

Notorious member
Wrist and lock panels shaped, had to take off a LOT of wood to expose the lock plate sufficiently and then match the right side with the left. Next step there is to carve the mouldings and perch ears but I'm going to wait until the trigger plate and guard is in place, and tang bolt is installed. I still need to drill the lock bolts and get the locations transferred to a pattern for the side plate and get that made and inlet too.
20240114_214950.jpg

Butt plate cleaned up on the inside and squared, reshaped a little on the anvil, and stock inlet for it. This plate was about 1/4" too short and nearly too narrow at the front of the return to scale correctly for the design but I made it work. Will still have to remove at least 1/16" of wood from the trigger guard to toe to make the necessary overlap for the toe plate. Lots of filing yet to do.

20240114_205243.jpg

20240114_205259.jpg

I also got all the barrel tenons installed and filed down to shape. Since I like to cheat whenever possible, I used my milling machine to trim the excess flush with the barrel.

20240114_213947.jpg

Full view. I went ahead and removed the square blank on the forearm left over from the duplicator, again there is barely enough wood there to blend since the router digs were very deep up against the edges of the block section. There also isn't much wood to carve around the inlet pipe, I hope it works out once I get the inlet thimble installed, we shall see. Isaac Haines did very shallow relief carving typical of the period so I should be able to pull off something passable.

20240114_214604_20240114220525432.jpg
 
Last edited:

RicinYakima

High Steppes of Eastern Washington
My goodness man! You work really quick! What you just showed took me almost 3 months when I was building mine. Are you using power tools?
 

Ian

Notorious member
Mostly files and chisels, but they are sharp. My secret wood eraser is a Shinto rasp, that thing hogs off material like you wouldn't believe. I only wish they made one that was convex like a farrier's rasp.
 

Snakeoil

Well-Known Member
Well, trust me when I say that I'm truly impressed with the progress. And some of the points that you made pointed out my ignorance of flintlocks. The flash hole being one of them. I do remember talking to Roger (the guy that ordered the rifle for me and a master builder) about a flash hole liner. I suspect the plan was to simply make my own. I want to say that he normally had them but was out of them the day I picked up the kit. That's a foggy memory on my part. But I never realized, or probably never noticed that the placement of the barrel relative to the lock would have not allowed it. I suspect I would have drilled into the barrel and found out the hard way.

I thought that the tang shape looked unusual for a period piece. I would have expected a different shape, maybe rounded or straight. I did not research Isaac Haines. Actually, did not research much at all. I wanted to build a LH flintlock and somehow learned about Roger. It might have been a call to ToW and someone there to me to contact Roger Vincent.

Regarding the wrong handed side plate. Your comment must've caused an extra synapse to fire. I remember Roger telling me that ToW did not have a LH side plate available. I don't remember what I was thinking at the time but suspect the same as you that I'd just make on from scratch.

You said you were going to make a toe plate. I thought that there was a toe plate in the kit. I swear I saw one when I was packing up the parts.

I thought that the nose cap was kinda beefy and figured I'd be spending much time getting material off it, let alone fitting it. I'll be looking forward to seeing your sheet metal cap. I'm trying to envision what that will look like.

I too though that the trigger plate was pretty basic. But again, being a true newbie to these kits, I had no real expectations. Plus, Roger spoke very highly of ToW and had built many rifles from their kits. But Roger was also a man truly obsessed with muzzle loaders and building them. My guess is, if they sent him a block of steel with a sticker on it saying "trigger assembly" he would have been contents and started whittling a trigger and base plate out of the block.

I had to look up Shinto Rasp. Looks like a bunch of coarse pitch hacksaw blades spot welded together in a diamond patter. Something that is similar to that, removes a lot of material fast and is CONVEX is a Stanley Surform Blade. Here is a link to an Amazon ad.
My guess is you are already familiar with these. But thought I'd mention it to be safe.

I have one of these and can attest to their ability to remove material. I learned about these rasps way back in auto-shop during high school We used them to remove Bondo quickly and rough down a patch. You can use them without the holder. I have one hanging over my bench.

I suspect that I spent more time fitting that lock than you did getting all the other work done. Not having a feel or experience in doing this made me go slow. I think it was the truly slow progress that drove my interest in finishing the rifle to wane. I got all juiced up again when I saw that finished Kibler rifle that a member at the club just finished a couple months ago. That's why I dragged out the kit. But when I had it all laid out on the bench and started looking at how much had yet to be done, the interest fizzled once again. I suspect that I had been trying to convince myself that I would enjoy shooting a muzzleloader. I've owned several over the years and have a LH Hawken that a neighbor gave me when he retired. It sits in the corner and the last time I shot it, it really did not do much for me. Guess I'm just not front stuffer kinda guy. But boy do I love how they hang when they are shouldered.

Very glad you decided to post a build log for the rifle. Will enjoy watching the progress on this, Ian. I'm also glad to see it getting finished. Dying to see how the figure in the wood comes out.
 

Ian

Notorious member
There is a toe plate but it is too short and nowhere near correct. I'll make a proper one, easy peasy.

Side plate I wanted to make from scratch anyway, mainly on account of wanting to put the lock bolts where I wanted and not where the plate dictates. I also want to use a different style from a particular Isaac Haines rifle.

The nose cap is too short, too thick, and too small on the outside. Often the inside can be milled out to thin it but this one is going in the scrap brass bucket. I'll document making a sheet metal one which is how the originals of the time period were made.

The trigger is a terrible fit on the pin, floppy and sloppy, and is pinned far too low to give a correct pull. Needs to be pinned about a half inch higher, so I'll make a traditional slotted plate and trigger and pin the trigger up high in the stock wood.

I have a variety of Sureform tools but they aren't for gun stocks. The coarse little shavers pull out chips and chunks, especially when the grain is curly. Great for doors and so forth though.

I'll keep posting as I go, there are going to be a zillion details to work through once I get all the furniture finished and mounted.
 

Snakeoil

Well-Known Member
I see your point about the trigger pin placement. Mechanical advantage is king for a nice light trigger.

Guess I had better go to the store and buy some popcorn.

Something else I wanted to mention. I don't want to hear all the BS about Facebook. I get it. But, there is a master engraver and stock maker named Jesse Kaufman who has a page and regularly posts videos of his work. He is the engraver that did all the firearms for the Remington 200 Years Collection. His work is flawless and I think ranks right up there with the masters like Angelo Bee.

Ian, I think it would be to your advantage to take a look at his work. He has a few vids on YouTube, but none of them are really just his work. His checkering is amazing. The man has the steadiest hands I've ever seen. He should be a neurosurgeon. But, he's also a superb speaker and down to Earth kinda guy. Watching him engrave will give you a true appreciation for what it take to engrave a rifle. And by "you", I'm talking to everyone here, not just Ian. If you don't want to join FB, fine. But if your wife or a friend or child has an account, have them find Jesse and take a look. You might just change your mind.
 
Last edited:
  • Like
Reactions: Ian

Brad

Benevolent Overlord and site owner
Staff member
Oh no, that won’t work.

Buy popcorn? Not to follow Ian, for that you must do what he would do.

Ian would decide the store bought popcorn wasn’t good enough. He would crossbreed different varieties until he got what he wanted. He would then buy a popper, take it apart, and rebuild it with at least 50% handmade parts of his design. And that is before lunch,
 

Ian

Notorious member
I see your point about the trigger pin placement. Mechanical advantage is king for a nice light trigger.

Not just mechanical advantage, but operating angles. The arc of the sear swing and the arc of the trigger swing need to overlay each other or the trigger blade and sear bar will drag across each other as they move. The arc centers of the trigger and sear, and the point at which the two parts contact at full cock all need to be in a straight line with the trigger pivot being about 1/3 the distance from the contact point to the sear pivot. You trade pull weight for travel here, but there is a "best" range of compromise.

The usual way of getting this alignment is to pin the trigger in the stock even with the sear bar. This puts the trigger pin about halfway vertically in the stock and happens to hide it between the lock and side plate.

The only practical way to get perfect trigger pull with a sidelock is with a set trigger arrangement. The sear bar geometry is less than ideal with those but your finger isn't directly involved in it.

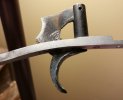
Here's a photo of the trigger assembly I made for my 20-gauge fowling piece. I deigned it with no raised lock panels and no side plate so nowhere to hide the pin. An integral pivot to the trigger plate was the best option, and this one is really easy to inlet...just sink a hole and slot back from it with a long, 1/8" carbide end mill.

20230402_164751.jpg

20230416_161723.jpg
 
Last edited:

Snakeoil

Well-Known Member
It never dawned on me that you would be installing the trigger pin in the actual wood. When you said that you would pin it high in the stock I thought you'd just be making a small tower/tang that would go up into the stock and which carried the trigger pivot pin. Putting the pin is the wood is not something that would have ever entered my mind.

Met my goal of learning something new every day early today. I can coast for the rest of the day now.
 

Ian

Notorious member
Worked on the inlet pipe over the weekend. It was pre-inlet with a router to dang near the rough cast dimensions so not much to work with. The rammer channel, drill hole, and all pipe inlets are off center about 1/8" from the barrel channel to the rifle's left so shaping the forestock and getting the inlet pipe put in became an exercise in trying to hide that. So it goes with most pre-inlet stocks.

20240122_210730.jpg

Here's after getting the pipe cleaned up for the inlet, sunk down all the way, and the forestock rough shaped.
20240122_215526.jpg

Several hours of careful filing on the pipe and forestock to blend the off-center and straighten out things as best I could. Doesn't look like much accomplished but I assure you its a lot:


20240123_210618.jpg
 

Ian

Notorious member
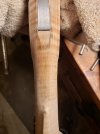
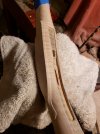
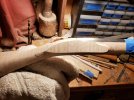
Tonight I started in on the side panel mouldings. The lock was inlet too far back and the right side panel was already milled too far forward so the tail of the right panel didn't have enough wood to match the lock panel at the proper width and flare so I narrowed both panels significantly and made them parallel with the barrel. This brought the tail of the right panel back just enough to not look goofy but left little wood to make the beaver tails of the lock panel mouldings. I managed to just barely get all that worked out.

Camera lens makes it look like the panels are reverse-tapered but in fact they are parallel. I worked a bit on the wrist to straighten it, taking wood off the right side behind the panel and beavertail and off the left back by the comb, blending it all the way to the butt on the left side.
20240124_214023.jpg

20240124_214356.jpg

20240124_213756.jpg

20240124_221557.jpg

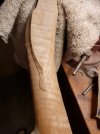
Got the lock panel sketched in. Note the the dark spots at the very front of the moulding at the pencil line, those are router marks from the duplicator. I will use every cell of wood left there to shape the moulding. They really cut it close.
20240124_221442.jpg
 
Last edited: